Mixed media Quickies!

I love doing these fast pages – first either lay down some color randomly with either paint or a water soluble pastel like Neocolors II, layer on two or three stencils, maybe a stamp or two, and add a stenciled saying or word.  Super fast, no stress, and the result is a good looking page that you didn’t sweat bullets over!

OLYMPUS DIGITAL CAMERA

Color is all Dylusions Paints dabbed  on with a make-up sponge.   Probably used 5 stencils on this one and no stamping.

OLYMPUS DIGITAL CAMERA

Paints by Martha Stewart and Dylusions.  Heart stencil by Dina Wakeley.  Stamps by Tim Holtz and Heather Bailey.

OLYMPUS DIGITAL CAMERA

A single stencil, a couple of stamps, pastel paints, and ‘Love and Peace” – all you need!

OLYMPUS DIGITAL CAMERA

Colored blocked background with a single stencil and saying – I love lots of layers, but I also love this simplicity.

OLYMPUS DIGITAL CAMERA

Lots of layers stencils, stamped butterfly, stenciled saying.  The plain white background makes these bright Dylusions Paints really sizzle!

OLYMPUS DIGITAL CAMERA

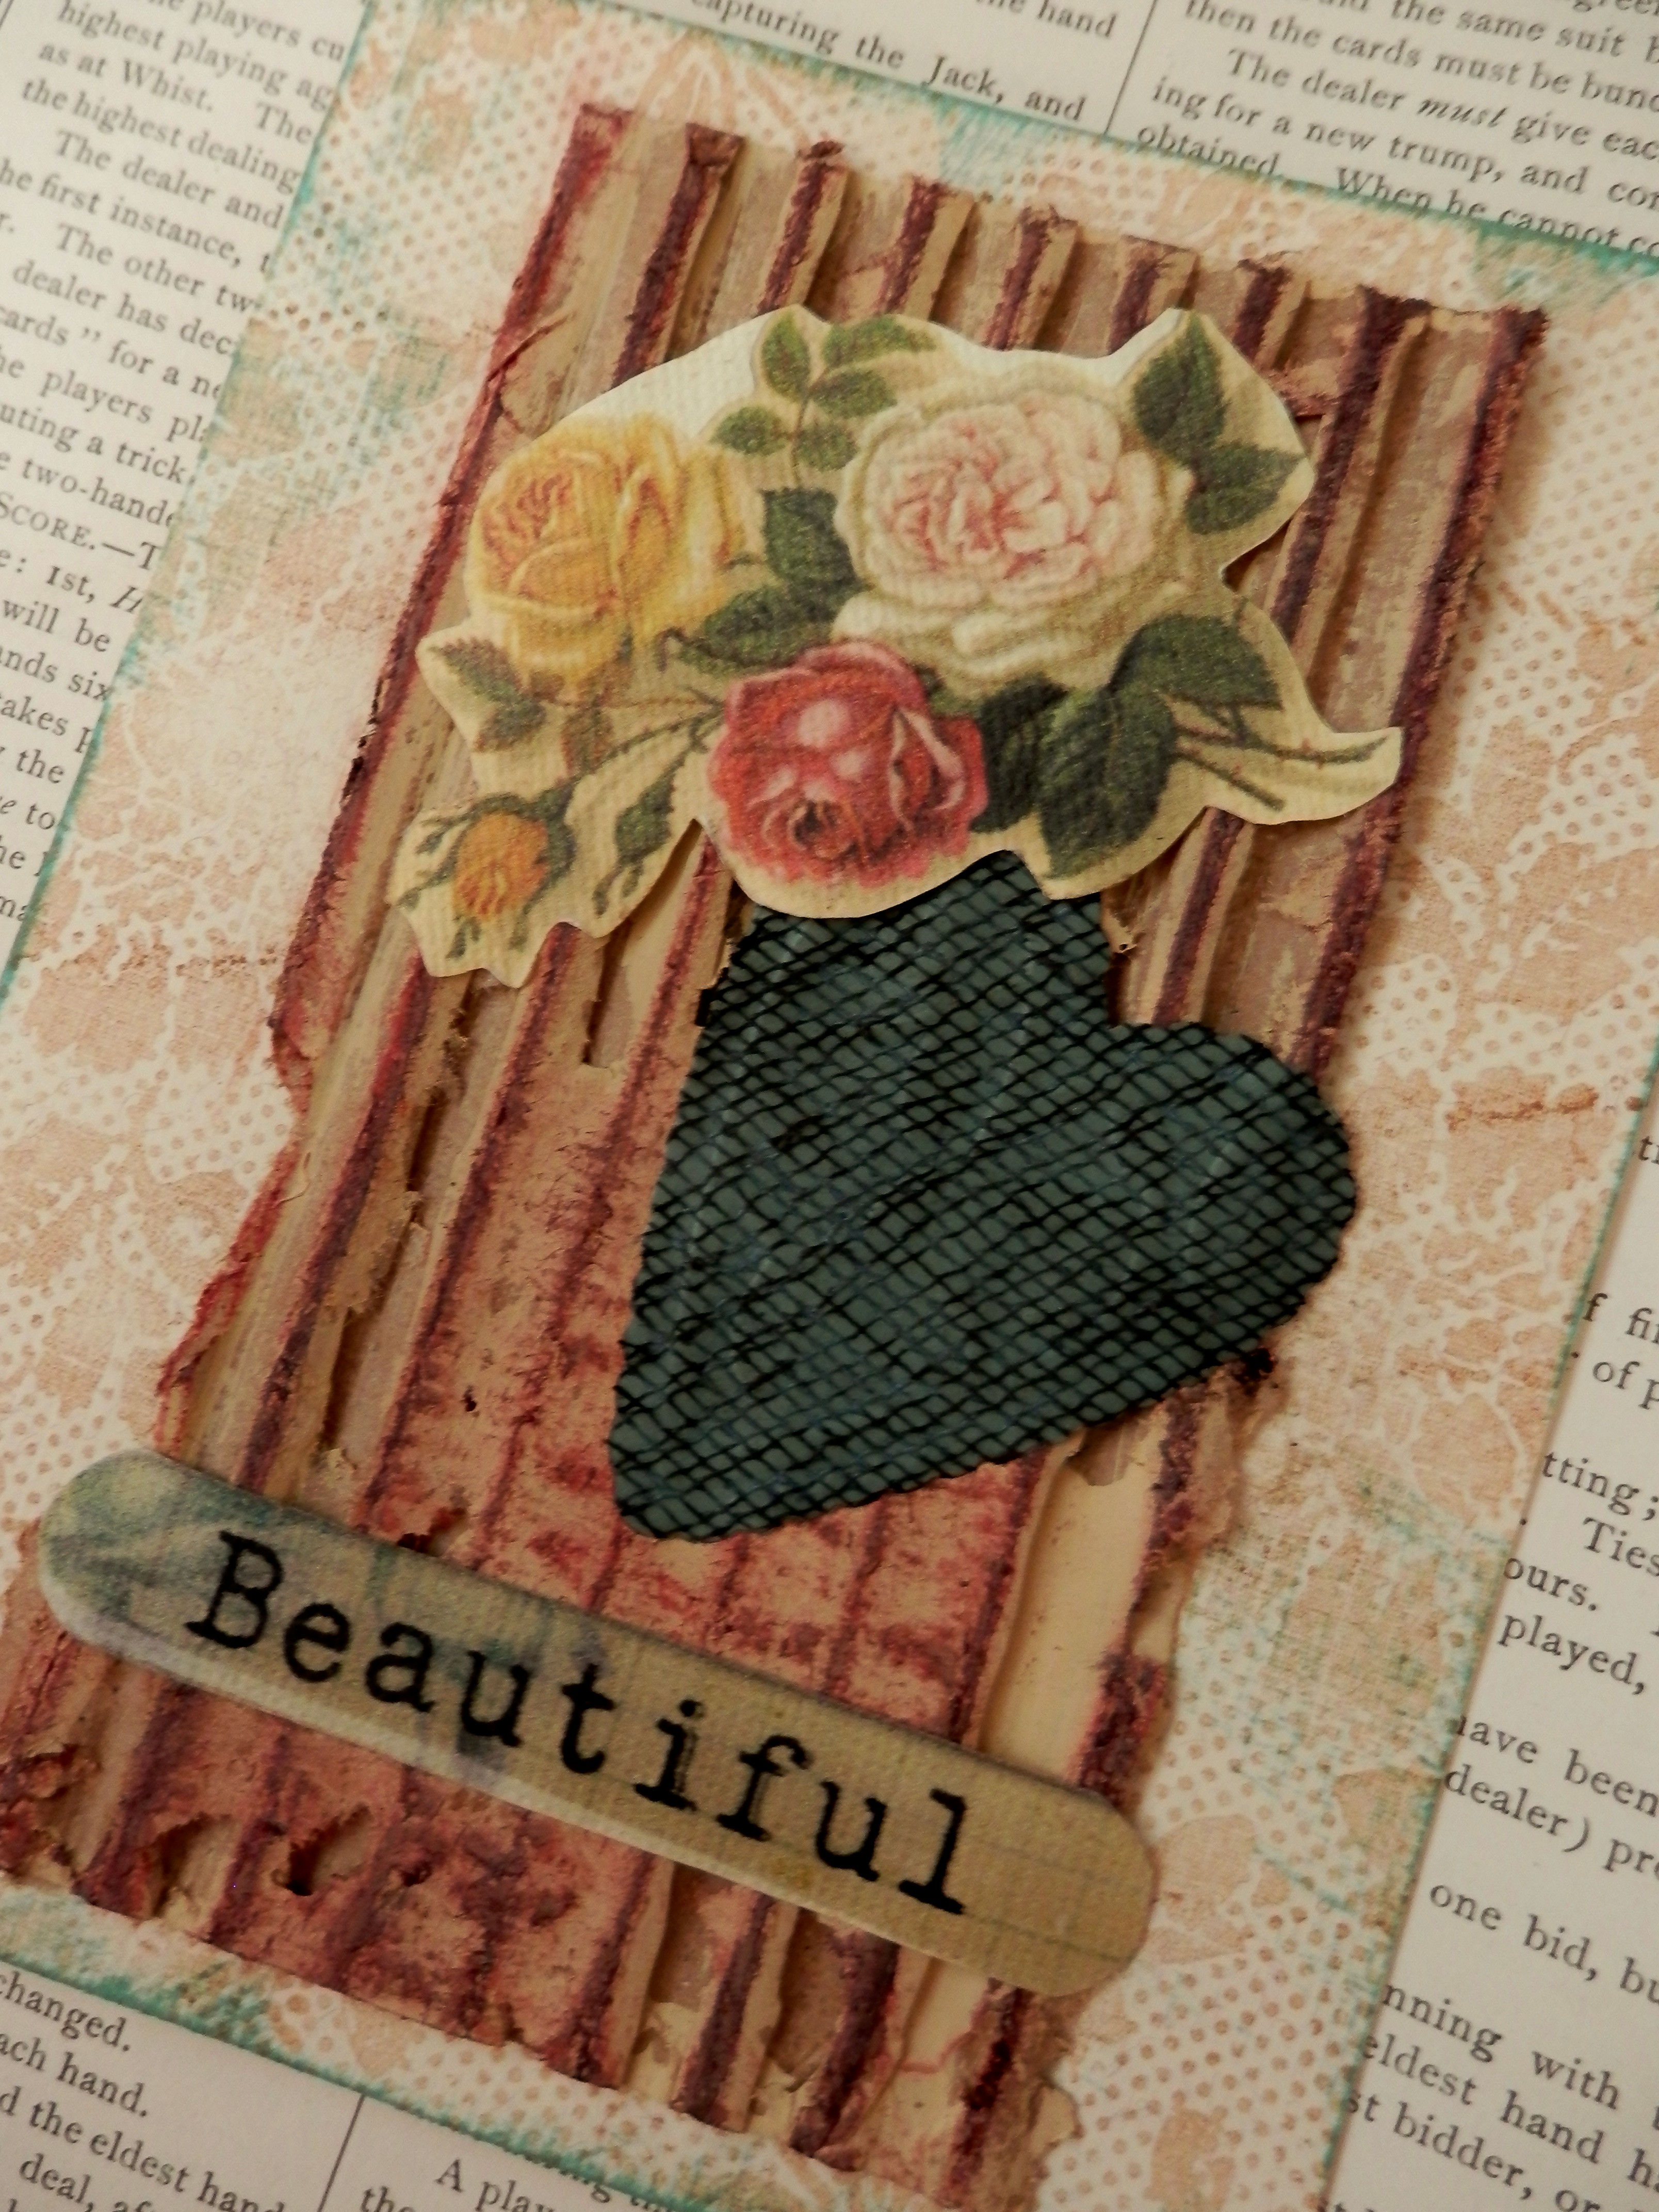
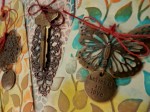
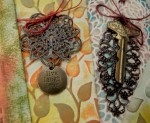
Some close up details from this series.

OLYMPUS DIGITAL CAMERA

OLYMPUS DIGITAL CAMERA

OLYMPUS DIGITAL CAMERA

Mixed Media Spread “Be Yourself”

I’m loving these Dylusions paints – such vibrant saturated color and yet, translucent!  Here’s the finished 7 x 10 piece, then pics of the process from paper collage through color-block painting, marking, stamping, stenciling, preparing embellishments and text.  Please leave a comment and ask any questions you may have.  I’m very user friendly!  Products used:  Canson Mixed Media Paper, Dylusions Paint, Archival Inks, stamp: Stampington & Co.,  stencil: The Crafters Workshop, paper flowers: Papermania, brads: Artemio, gel medium: Daler-Rowney.

OLYMPUS DIGITAL CAMERA

Finished 7 x 10 Mixed Media – “Be Yourself”

OLYMPUS DIGITAL CAMERA

Collage book text onto mixed media paper.

OLYMPUS DIGITAL CAMERA

Add stamped script.  I blurred it a bit by double stamping.

OLYMPUS DIGITAL CAMERA

Fingerpaint blocks of color with acrylic paints.  Add marks with the edge of a credit card.

OLYMPUS DIGITAL CAMERA

Add stenciling.  I did mine by daubing on Archival Ink through the stencil.

OLYMPUS DIGITAL CAMERA

Prepare your choice of embellishments.  I fingerpainted some paper flowers.  Too fun!

OLYMPUS DIGITAL CAMERA

Stamp text onto stock that you’ve inked a bit, or onto colored or patterned stock.

OLYMPUS DIGITAL CAMERA

Play with positioning your embellishments till you are happy.  If using flowers, attach with brads.  Add the text with gel medium. Voila! Completed! I hope you’ve enjoyed this spread. Please comment and follow! THANK YOU for checking me out. ♥ ♥ ♥

CORRUGATED CARDBOARD – Don’t throw it away! Transform this common toss-away into a beautiful, textured card.

OLYMPUS DIGITAL CAMERA

Cardboard box dividers

OLYMPUS DIGITAL CAMERA

Dividers torn into pieces and top layer of paper stripped off.

OLYMPUS DIGITAL CAMERA

Mix some acrylic paint into gesso.

OLYMPUS DIGITAL CAMERA

Paint onto prepared cardboard pieces.

OLYMPUS DIGITAL CAMERA

When gesso is dry, swipe over with a variety of colored inks.

OLYMPUS DIGITAL CAMERA

Assemble a selection of small images.

OLYMPUS DIGITAL CAMERA

Stamp the edges of your blank cards with backgrounds

OLYMPUS DIGITAL CAMERA

Layer the cardboard pieces and a variety of embellishments until you are happy with the composition.

Finished card. Heart was die cut on my Big Shot with a Sizzix Embosslit.

Finished card. Heart was die cut on my Big Shot with a Sizzix Embosslit.

Finished card. Note that edges of card have additional inking. Burlap heart was cut on my Big Shot with a Spellbinders Scalloped Heart die.

Finished card. Note that edges of card have additional inking. Burlap heart was cut on my Big Shot with a Spellbinders Scalloped Heart die.

These embellishments are not yet glued down, but I wanted to show it here and was impatient!

These embellishments are not yet glued down, but I wanted to show it here and was impatient!

Larger heart was fussy cut from a homemade template and inked around the edge.

Larger heart was fussy cut from a homemade template and inked around the edge.

Footloose in the foothills of California

Ha!  So delighted to have taken this step and started a blog!  I’ll be showcasing my mixed media work, pimping my shop, A. Flowers, in Jamestown California, and sharing lots of techniques and tutorials to help you add to your arsenal as a mixed media maker.  I just this minute figured out how to add text to my pictures (I’m not a techie, I’m a manipulator of color, texture, composition, images), so VERY SOON those photographic tutorials will be appearing.  Please follow the blog and add comments – lots of them, daily if you can!  Questions are welcome!  I enjoy sharing my process.  Share on whatever social media sites you enjoy.  My learning curve is pretty steep these days, but I’m hoping to add video tutorials also.  Thanks for visiting.  Come back soon.

P.S.  Remember to follow, comment, and share.  THANK YOU!

Embossed charm tags